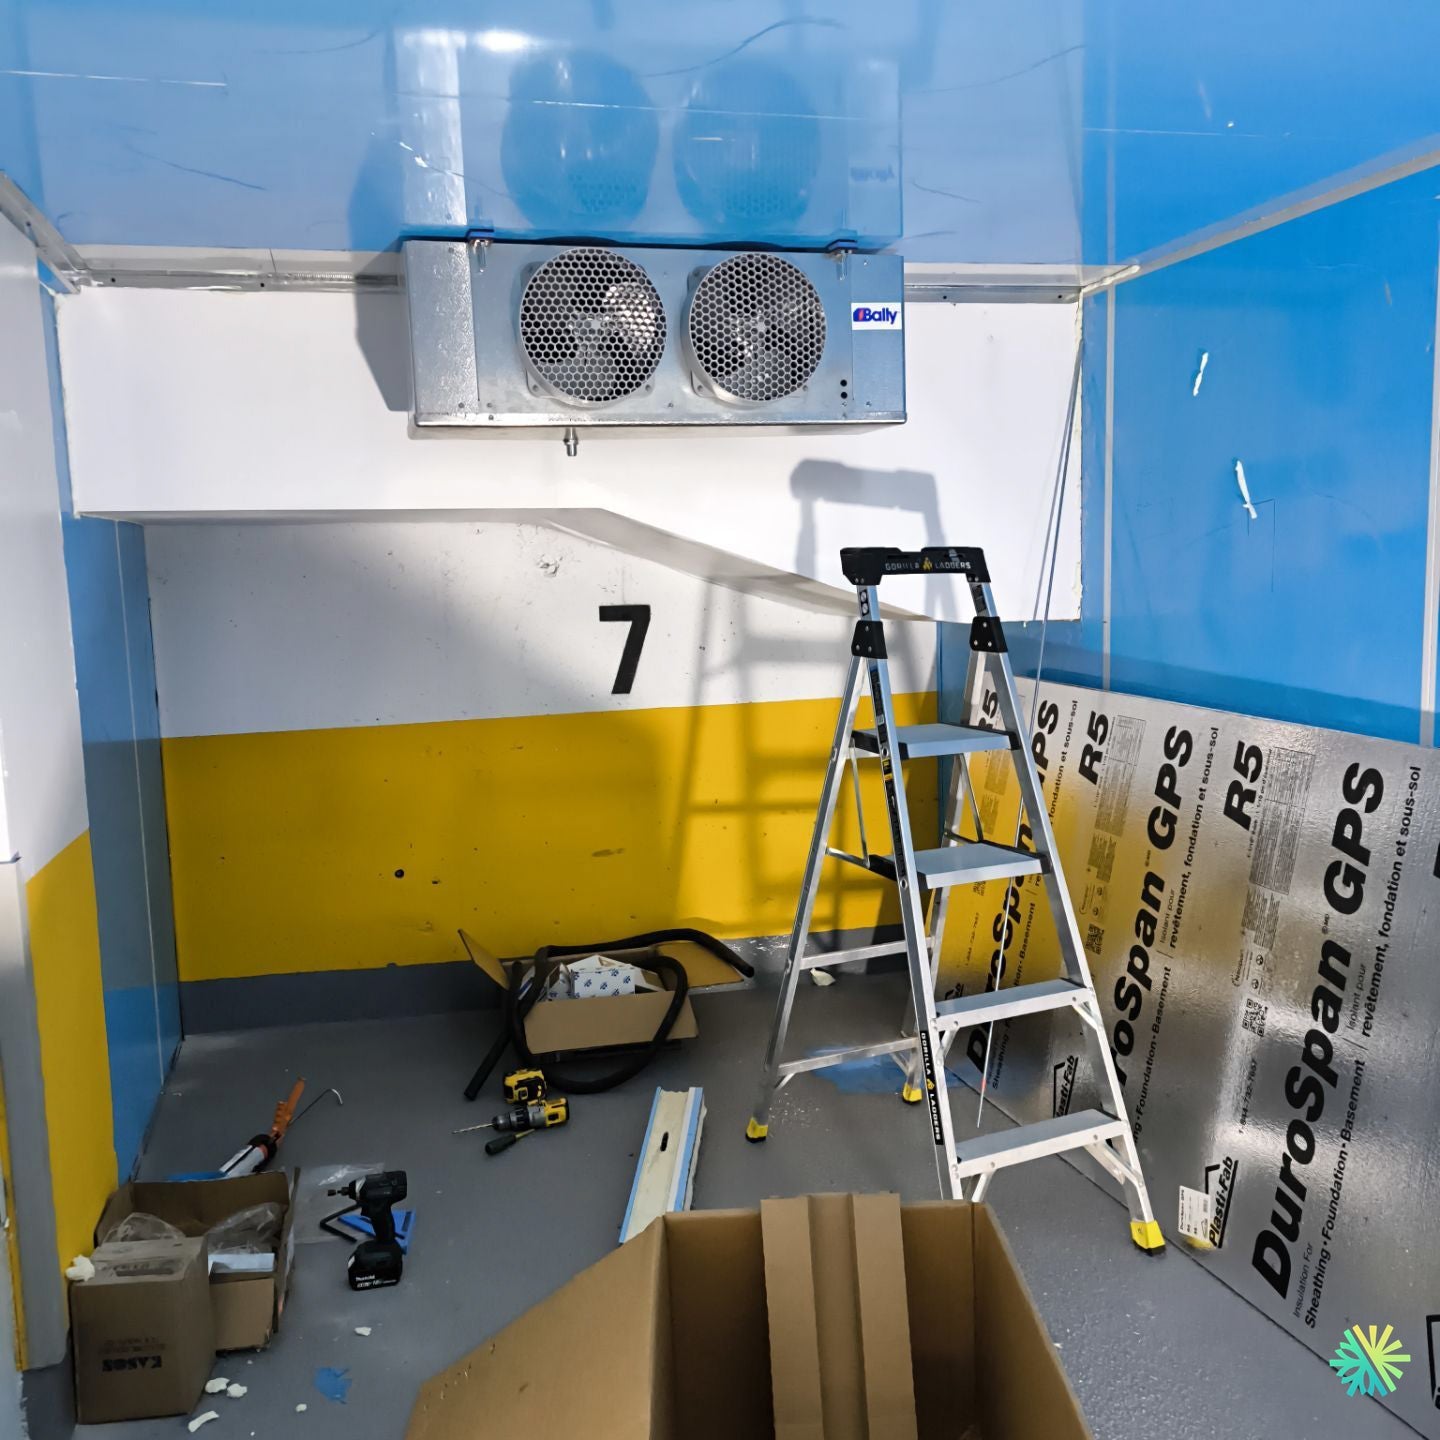
Installation of a wall-mounted evaporator for a commercial cold room
At AirGreen , we recently completed a Bally refrigeration system installation in a commercial space located in Ville-Marie , in the heart of Montreal. This intervention perfectly illustrates our expertise in installing and optimizing specialized HVAC systems for temperature-controlled environments, such as cold rooms intended for food or pharmaceutical storage.
Project background
The client, a food business owner, needed a small cold room to store fresh produce at a constant temperature of 2 to 4°C. The available space was located in an underground parking lot converted into a technical room , with height and insulation constraints.
Our mission was to:
-
Install a Bally dual-vent wall-mounted evaporator .
-
Optimize thermal insulation with DuroSpan GPS R5 panels.
-
Integrate the condensate drainage system and refrigeration lines.
-
Ensure clean, secure electrical wiring that meets commercial standards.
Step 1 – Preparing the cold room
Before installing the Bally unit, our team first checked the insulation structure . The existing walls had thermal bridges that could compromise energy performance.
We therefore proceeded to:
-
Installation of high-performance DuroSpan GPS R5 insulation panels on the walls and ceiling.
-
Complete sealing of joints with industrial silicone sealant to ensure a perfect seal.
-
Floor leveling with a non-slip coating suitable for refrigerated environments.
Step 2 – Installing the Bally Evaporator
The Bally unit, renowned for its reliability in the commercial sector, was securely fixed to the upper wall of the room. This compact model with dual axial fans provides excellent air circulation, essential for maintaining a consistent temperature throughout the cold room.
The key steps of this phase:
-
Reinforced mechanical anchoring on metal frame.
-
Refrigeration connection with nitrogen brazing to prevent any internal oxidation.
-
Installation of the defrost drain , including a heating cable to prevent freezing in periods of low temperature.
Step 3 – Electrical connection and commissioning
The wiring was done according to CSA standards with shielded conductors and independent circuit breakers for the compressor and fans.
We then have:
-
Tested electrical continuity and grounding .
-
Checked the pressure and temperature parameters of the refrigeration circuit.
-
Set the digital temperature and defrost controller .
Once the installation was complete, the system was started up and calibrated . After 45 minutes of operation, the set temperature of 3°C was reached, confirming the effectiveness of the installation.
Step 4 – Final check and validation
Before handing over the system to the customer, we carried out a complete check of the airflow and condensate .
Our technicians have validated:
-
The absence of excessive vibrations.
-
A steady and quiet airflow.
-
Optimal cooling performance thanks to well-regulated defrosting.
We then trained the customer on how to use the programmable thermostat and provided a preventative maintenance plan , including coil cleaning and seasonal refrigerant checks.
Result: a high-performance turnkey solution
With this installation, the customer now benefits from a stable, quiet and energy-efficient refrigeration system . The Bally brand, renowned for its robustness, coupled with quality DuroSpan insulation, guarantees long-lasting efficiency and controlled electricity consumption.
This project once again demonstrates AirGreen's ability to adapt its HVAC installations to complex environments , whether it be a business, a warehouse or a space with specific constraints like here in Ville-Marie.

