
Installation of a Tosot Lomo 23 Mini Split in Sainte-Marthe-sur-le-Lac
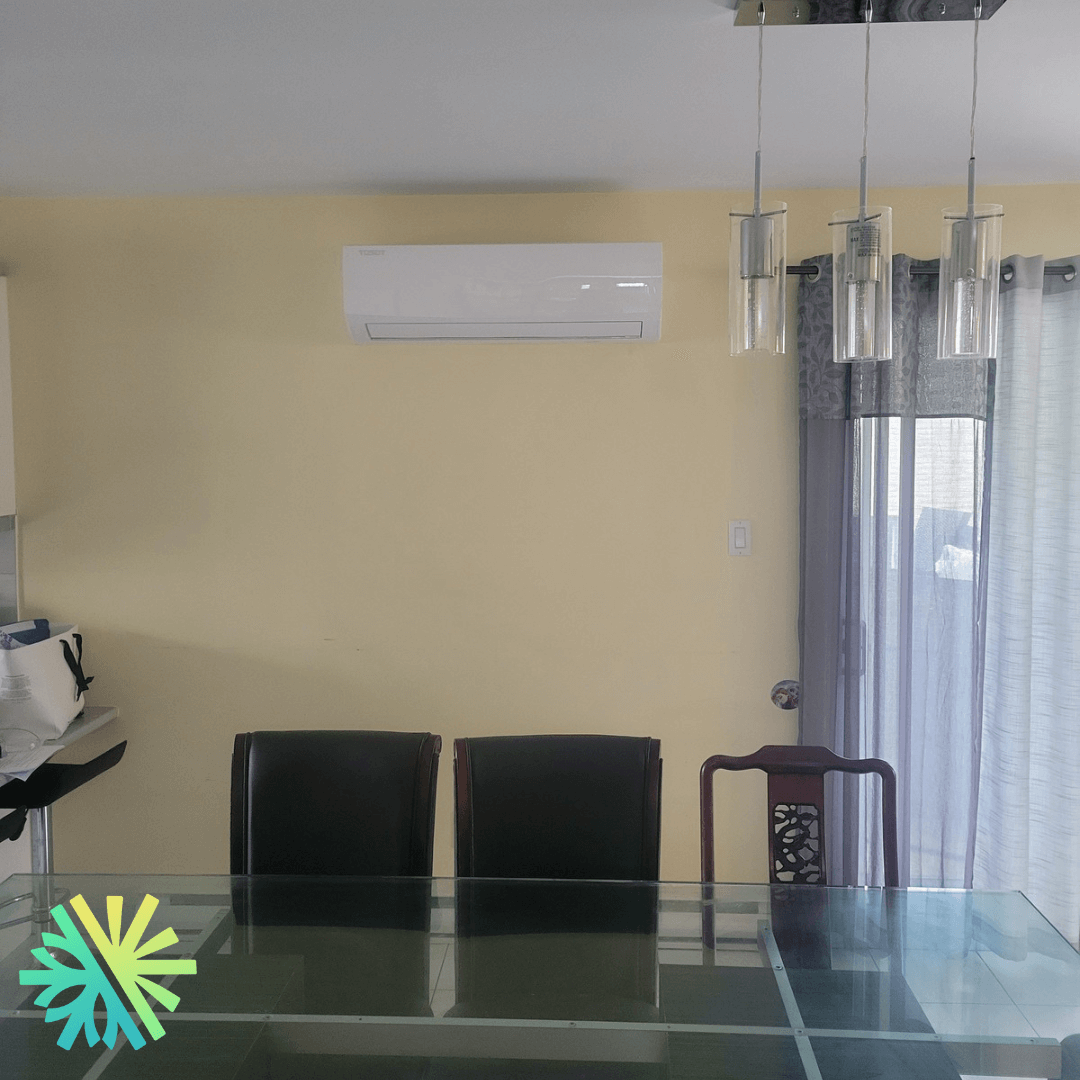
Seamless and concealed installation with no touch-ups needed! Find out why our Tosot Mini Split installations leave customers smiling.
Take a tour of the installation
Each number is a point we check on site. Switch between summer and winter to watch air and heat move.
In summer, the outdoor unit rejects the house's heat outside.
Generic illustration of this type of installation, not a survey of this job site. Tap a number.
Mounted level on a wall plate, high enough for the air to reach the whole room, with enough space around it to slide the filters out easily.
The refrigerant lines, the communication cable and the drain go through the wall in a single opening, sealed against water, cold air and insects.
Two insulated copper pipes connect the two units. Outside, a line cover can protect them from sun, knocks and weather.
A shut-off switch near the outdoor unit isolates it safely for service. It must stay accessible at all times.
The compressor and the fan. In heating mode it captures heat from the outdoor air, even in winter, and moves it inside.
On the ground or on the wall, it keeps the unit above accumulated snow. The unit stays clear and defrost water can drain away.
The fan needs to blow freely. Storage, a fence or a wall too close, and efficiency drops while noise goes up.
A Seamless Installation Story: Behind the Scenes with AirGreen
Understanding the Basics of Our Latest Installation
Last week, the AirGreen team embarked on a streamlined installation project that not only met but exceeded customer expectations in Sainte-Marthe-sur-le-Lac. This wasn't just any installation; it was a setup involving the sleek and efficient Tosot Lomo 23 Mini Split, a model known for its simplicity and high efficiency.
Customer-Centric Installation Approach
From the outset, our goal was clear: to ensure that our customer's comfort and satisfaction were prioritized. The client desired a minimalistic approach, requesting that both the indoor and outdoor units of the Tosot Lomo 23 be mounted on the same wall. This specific placement was not only aesthetically pleasing but also functionally strategic. By aligning both units on one wall, we were able to minimize the use of materials and conceal piping and wiring effectively behind the indoor unit. The result was a clean, unobtrusive installation that required no subsequent touch-ups or finishing work—truly a testament to the precision and foresight of our skilled technicians.
Key Features of the Tosot Lomo 23 Mini Split
- Energy Efficiency: With an impressive 22.0 SEER efficiency rating, this unit is ENERGY STAR® certified, ensuring that our customer enjoys reduced energy consumption and cost savings.
- Smart Connectivity: Optional WiFi connectivity offers the convenience of controlling the system remotely, enhancing user experience and accessibility.
- Advanced Heating Technology: Capable of providing heat even at chilling temperatures of up to -25°C, thanks to its robust two-stage inverter technology from GREE.
- Quiet Operation: The unit operates quietly with sound pressure levels as low as 29 dB(A) indoors, ensuring a disturbance-free environment.
Professionalism and Precision: The AirGreen Promise
Our installation process at Sainte-Marthe-sur-le-Lac underscores our commitment to providing tailored HVAC solutions. The Tosot Lomo 23, eligible for a $385 rebate under the LogisVert Program by Hydro-Québec, not only offers financial incentives but also promises long-term reliability and comfort. Our team's ability to adapt to the customer's needs without compromising on service quality or environmental aesthetics speaks volumes about our dedication to excellence.
Why Choose AirGreen for Your HVAC Needs?
Expertise and Reliability
Choosing AirGreen means opting for a partner who understands the intricacies of HVAC systems and more importantly, values your comfort and satisfaction. Our technicians are not just skilled; they are artisans who blend technical expertise with a deep understanding of aesthetic and functional requirements.
Customer Satisfaction: Hear It from Our Clients
Our approach to installation is not just about placing a unit; it's about ensuring each client feels heard, valued, and satisfied. The joy expressed by our client in Sainte-Marthe-sur-le-Lac, who praised the seamless installation and the discreet, efficient performance of their new Tosot Lomo 23, reaffirms our mission. We're not just installing units; we're enhancing lifestyles and ensuring comfort across seasons.
Future-Ready Solutions
At AirGreen, we don't just stay current with technology; we anticipate future needs. Whether it's the latest in energy efficiency or advancements in user-friendly features, our installations are designed to provide value not just today but for years to come.
The big day, step by step
The main steps of this kind of job at AirGreen. Every house has its quirks: the estimate brings them out.
We look at the room, the outside wall, the line route and where the outdoor unit will go. That is where the capacity gets chosen.
Model, capacity and price, in writing. We also check whether the model qualifies for assistance programs.
Floors and furniture protected, wall plate position marked level, wall opening located.
A single opening, with the slope the drain needs to flow outside.
Set on a stand raised above the snow, with the clearances the manufacturer requires.
Connected, insulated and protected. The opening is then sealed against water, cold air and insects.
A dedicated circuit and an accessible disconnect near the outdoor unit.
Leak test, vacuum, then start-up and a check of heating and cooling.
Remote, modes, filters: we show you the essentials before we leave.
- The on-site estimateWe look at the room, the outside wall, the line route and where the outdoor unit will go. That is where the capacity gets chosen.
- The quoteModel, capacity and price, in writing. We also check whether the model qualifies for assistance programs.
- Getting readyFloors and furniture protected, wall plate position marked level, wall opening located.
- The wall openingA single opening, with the slope the drain needs to flow outside.
- The outdoor unitSet on a stand raised above the snow, with the clearances the manufacturer requires.
- Lines, cable and drainConnected, insulated and protected. The opening is then sealed against water, cold air and insects.
- The electrical workA dedicated circuit and an accessible disconnect near the outdoor unit.
- Tests and start-upLeak test, vacuum, then start-up and a check of heating and cooling.
- The walkthroughRemote, modes, filters: we show you the essentials before we leave.
What would it look like at your place?
Two quick checks with real numbers: what heat costs, and what your current heaters add up to in BTU/h.
Conversion: 1 W = 3.412 BTU/h. An indication, not a load calculation: baseboards and furnaces are often stronger than the real need, and they can stay as backup. AirGreen confirms the capacity on site.
Four mistakes we do not make
Flip each card to see what we do instead.
Your own project, step by step
What to do, season by season
Three habits per season for this unit. They take a few minutes and prevent many calls.
- Clean the indoor unit's filters.
- Clear leaves and debris left on the outdoor unit by winter.
- Test cooling before the first hot days.
- Clean the filters more often when the unit runs a lot.
- Keep plants away from the outdoor unit.
- Check that no water drips from the indoor unit.
- Rake the leaves around the outdoor unit.
- Test heating before the first cold days.
- Book periodic maintenance before winter.
- Keep snow away from the stand and the front of the unit.
- Let the unit defrost: it is normal.
- Never hit the ice on the fins; call us if the unit stays iced up.
Is your home ready?
Check what applies at your place. A "no" is not a refusal: it is what we sort out during the estimate.
Four statements: true or false?
It all comes down to details you have just seen.
1. In heating mode, the outdoor unit can produce water.
During defrost cycles. That water must drain away without forming ice.
2. You pick the capacity with a simple square-footage rule.
Windows, insulation, orientation and how the room is used all count. Capacity is chosen on site.
3. A multi-zone connects several indoor heads to a single condenser.
One head per room, all on the same condenser. Each room keeps its own temperature.
4. The disconnect can sit behind the patio furniture.
It must stay accessible: it is what shuts the unit off for service.
0 / 4 right answers
What people ask us about this kind of work
Does a wall-mounted heat pump heat in winter?
Wall-mounted or multi-zone: how do I choose?
Where does the outdoor unit go?
Are there grants?
Do I need a permit?
How cold can it heat?
How much can I save?
How is the LogisVert assistance calculated?
Is it noisy?
The outdoor unit is covered in ice: is that normal?
Does AirGreen hold the required licences?
Is the estimate free?
No question matches. Write to us: we answer.
More jobs to see, near you
By town, by equipment or by region: browse more than 4,700 published projects.
Each dot: a town where AirGreen has published projects. The glowing dot: this job.
Every house has its constraints. We see them before we install.
The on-site estimate is free and the quote follows within 24 hours.
Text and photo: a real AirGreen Climatisation & Chauffage job. The diagrams are generic illustrations of the type of installation, not a survey of this job site. Sources of the added figures: airgreen.ca product pages (NEEP / AHRI performance), Hydro-Québec (Heat pumps page, LogisVert, read on 13 October 2026), Régie de l’énergie (rate D as of 1 April 2026).