
Installation of a GREE LIVO GEN4 Wall-Mounted Heat Pump in Sainte-Anne-de-Bellevue
Transform your space with AirGreen's expert GREE LIVO GEN4 installation in Sainte-Anne-de-Bellevue—where functionality meets style.
Take a tour of the installation
Each number is a point we check on site. Switch between summer and winter to watch air and heat move.
In summer, the outdoor unit rejects the house's heat outside.
Generic illustration of this type of installation, not a survey of this job site. Tap a number.
Mounted level on a wall plate, high enough for the air to reach the whole room, with enough space around it to slide the filters out easily.
The refrigerant lines, the communication cable and the drain go through the wall in a single opening, sealed against water, cold air and insects.
Two insulated copper pipes connect the two units. Outside, a line cover can protect them from sun, knocks and weather.
A shut-off switch near the outdoor unit isolates it safely for service. It must stay accessible at all times.
The compressor and the fan. In heating mode it captures heat from the outdoor air, even in winter, and moves it inside.
On the ground or on the wall, it keeps the unit above accumulated snow. The unit stays clear and defrost water can drain away.
The fan needs to blow freely. Storage, a fence or a wall too close, and efficiency drops while noise goes up.
Blending Innovation with Aesthetics: A Case Study of Custom Installation
At AirGreen, our commitment is to deliver not just products, but tailored solutions that enhance the comfort and aesthetics of your space. Our recent project in Sainte-Anne-de-Bellevue perfectly exemplifies this approach. We installed the GREE LIVO GEN4, a wall-mounted heat pump, which is not only a testament to modern HVAC technology but also a showcase of our meticulous installation craft.
The Challenge: Aesthetic Integration in a Multi-Functional Space
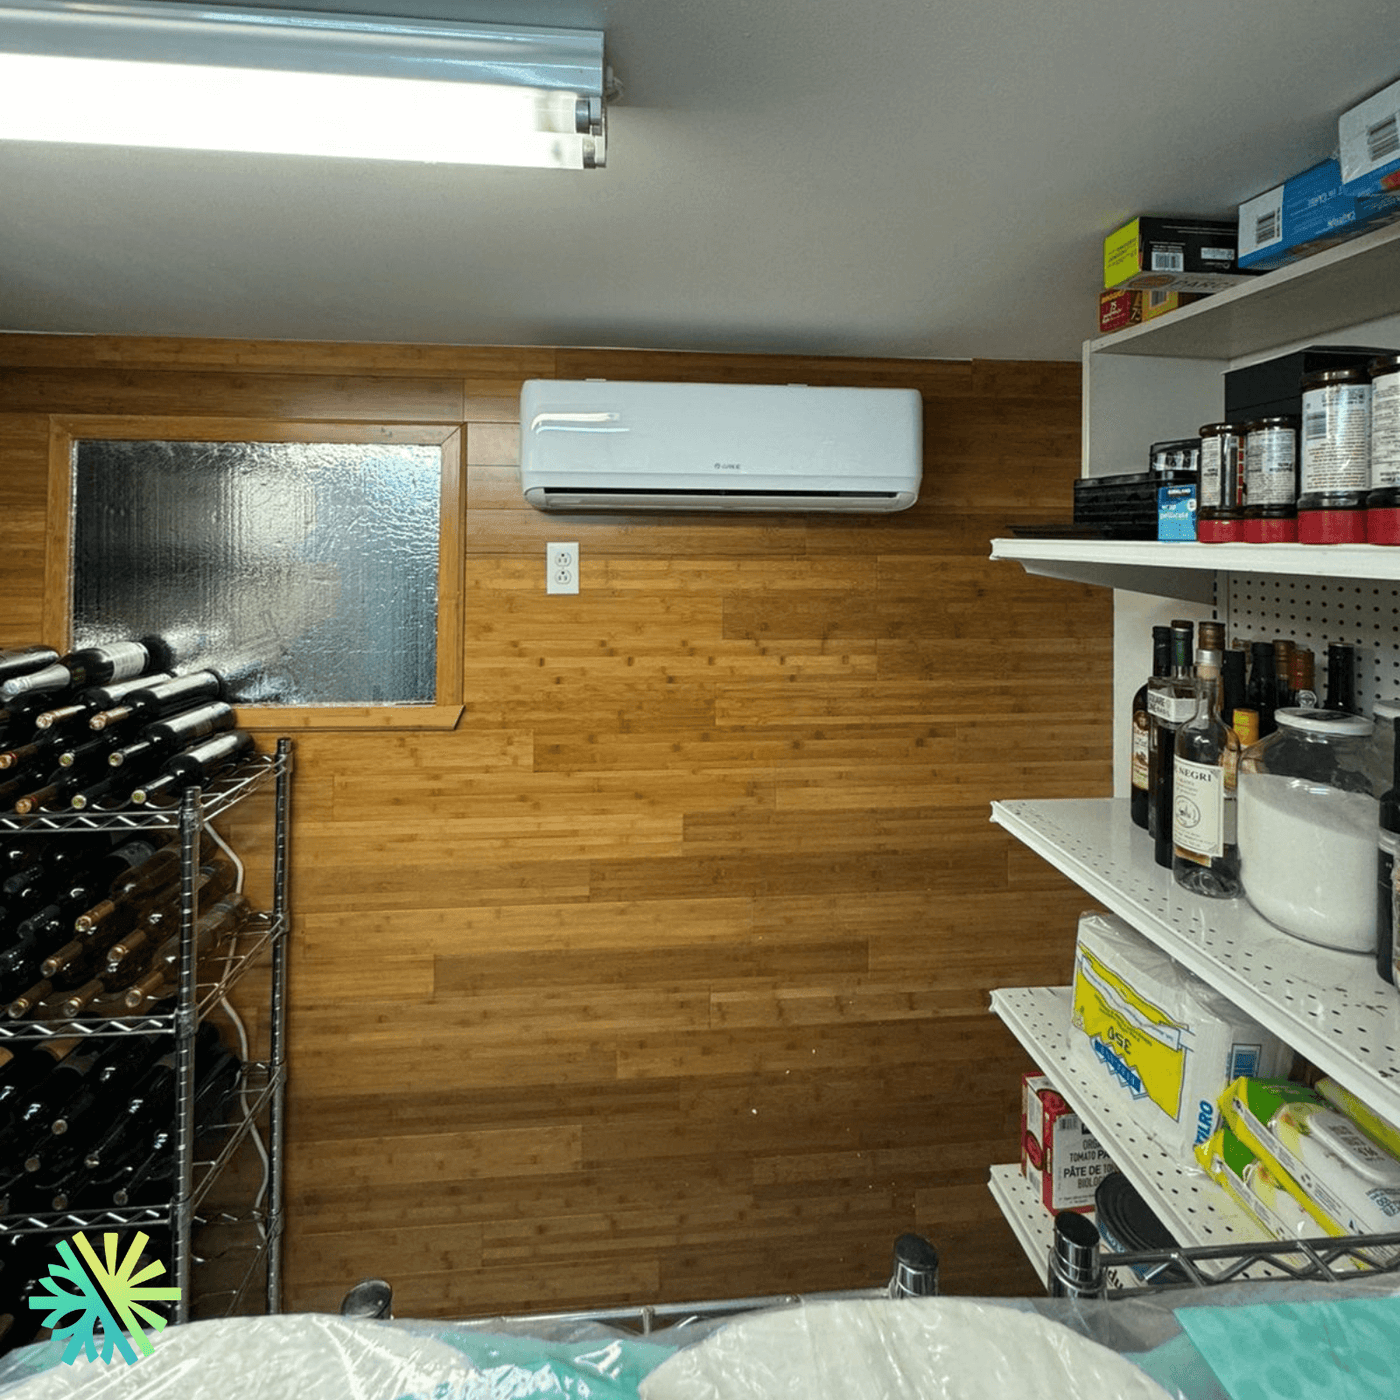
The client's requirement was clear: install a high-performance heat pump that blends seamlessly into a multifunctional basement used as both a storage area and a cozy retreat. The GREE LIVO GEN4, with its sleek design and robust performance, was the ideal choice. However, the challenge was to install this unit in a way that complemented the room's aesthetics while ensuring optimal functionality.
Technical Excellence and Custom Solutions
Our team embarked on this installation with a dual focus: technical excellence and aesthetic harmony. The GREE LIVO GEN4 model boasts impressive features like a 18.5 SEER efficiency, WiFi capability, and a 12-year warranty on both the compressor and parts. Its technical prowess was perfect for the demands of the client's space, ensuring both cooling and heating capacities up to -25 °C.
To meet the aesthetic needs, special attention was paid to concealing the piping and electrical wiring behind the unit. This not only ensured a clean and unobtrusive look but also protected the connections from any potential physical or environmental damage.

Installation Specifics
- Location: The unit was strategically placed above the eye level on a wood-paneled wall, which not only helped in achieving a seamless look but also facilitated optimal air distribution.
- Sound Levels: We ensured that the operation noise was minimal, with indoor sound pressure levels as low as 27 dB(A), making it one of the quietest in its category.
- Advanced Features: The inclusion of features such as I-Feel technology for customized comfort, multiple fan speeds, and intelligent pre-heating enhances user experience, adapting to the specific climatic conditions of Sainte-Anne-de-Bellevue.
The Result: A Testimony of Uncompromised Quality
The installation was a success, with the unit perfectly aligning with the wooden aesthetic of the basement, offering both functionality and style. The discrete installation of the piping and electrical wiring ensured that the integrity of the room’s design was maintained, proving that our solutions are not just about air conditioning but about enhancing the overall ambiance of the space.
Why Choose AirGreen?
At AirGreen, we don't just install units; we integrate them into your life. Our approach is always customer-centric, ensuring that every installation is thoughtfully planned and expertly executed to meet the specific needs of our clients. With our focus on quality, reliability, and aesthetic appeal, we provide HVAC solutions that are not only effective but also add value to your property.
Choosing AirGreen means opting for an HVAC partner who understands the nuances of modern living and is committed to delivering solutions that are both innovative and practical.
The big day, step by step
The main steps of this kind of job at AirGreen. Every house has its quirks: the estimate brings them out.
We look at the room, the outside wall, the line route and where the outdoor unit will go. That is where the capacity gets chosen.
Model, capacity and price, in writing. We also check whether the model qualifies for assistance programs.
Floors and furniture protected, wall plate position marked level, wall opening located.
A single opening, with the slope the drain needs to flow outside.
Set on a stand raised above the snow, with the clearances the manufacturer requires.
Connected, insulated and protected. The opening is then sealed against water, cold air and insects.
A dedicated circuit and an accessible disconnect near the outdoor unit.
Leak test, vacuum, then start-up and a check of heating and cooling.
Remote, modes, filters: we show you the essentials before we leave.
- The on-site estimateWe look at the room, the outside wall, the line route and where the outdoor unit will go. That is where the capacity gets chosen.
- The quoteModel, capacity and price, in writing. We also check whether the model qualifies for assistance programs.
- Getting readyFloors and furniture protected, wall plate position marked level, wall opening located.
- The wall openingA single opening, with the slope the drain needs to flow outside.
- The outdoor unitSet on a stand raised above the snow, with the clearances the manufacturer requires.
- Lines, cable and drainConnected, insulated and protected. The opening is then sealed against water, cold air and insects.
- The electrical workA dedicated circuit and an accessible disconnect near the outdoor unit.
- Tests and start-upLeak test, vacuum, then start-up and a check of heating and cooling.
- The walkthroughRemote, modes, filters: we show you the essentials before we leave.
What would it look like at your place?
Two quick checks with real numbers: what heat costs, and what your current heaters add up to in BTU/h.
Conversion: 1 W = 3.412 BTU/h. An indication, not a load calculation: baseboards and furnaces are often stronger than the real need, and they can stay as backup. AirGreen confirms the capacity on site.
Four mistakes we do not make
Flip each card to see what we do instead.
Your own project, step by step
What to do, season by season
Three habits per season for this unit. They take a few minutes and prevent many calls.
- Clean the indoor unit's filters.
- Clear leaves and debris left on the outdoor unit by winter.
- Test cooling before the first hot days.
- Clean the filters more often when the unit runs a lot.
- Keep plants away from the outdoor unit.
- Check that no water drips from the indoor unit.
- Rake the leaves around the outdoor unit.
- Test heating before the first cold days.
- Book periodic maintenance before winter.
- Keep snow away from the stand and the front of the unit.
- Let the unit defrost: it is normal.
- Never hit the ice on the fins; call us if the unit stays iced up.
Is your home ready?
Check what applies at your place. A "no" is not a refusal: it is what we sort out during the estimate.
Four statements: true or false?
It all comes down to details you have just seen.
1. In heating mode, the outdoor unit can produce water.
During defrost cycles. That water must drain away without forming ice.
2. You pick the capacity with a simple square-footage rule.
Windows, insulation, orientation and how the room is used all count. Capacity is chosen on site.
3. A multi-zone connects several indoor heads to a single condenser.
One head per room, all on the same condenser. Each room keeps its own temperature.
4. The disconnect can sit behind the patio furniture.
It must stay accessible: it is what shuts the unit off for service.
0 / 4 right answers
What people ask us about this kind of work
Does a wall-mounted heat pump heat in winter?
Wall-mounted or multi-zone: how do I choose?
Where does the outdoor unit go?
Are there grants?
Do I need a permit?
How cold can it heat?
How much can I save?
How is the LogisVert assistance calculated?
Is it noisy?
The outdoor unit is covered in ice: is that normal?
Does AirGreen hold the required licences?
Is the estimate free?
No question matches. Write to us: we answer.
More jobs to see, near you
By town, by equipment or by region: browse more than 4,700 published projects.
Each dot: a town where AirGreen has published projects. The glowing dot: this job.
Every house has its constraints. We see them before we install.
The on-site estimate is free and the quote follows within 24 hours.
Text and photo: a real AirGreen Climatisation & Chauffage job. The diagrams are generic illustrations of the type of installation, not a survey of this job site. Sources of the added figures: airgreen.ca product pages (NEEP / AHRI performance), Hydro-Québec (Heat pumps page, LogisVert, read on 13 October 2026), Régie de l’énergie (rate D as of 1 April 2026).