
Installation of a Tosot wall-mounted heat pump in Chomedey, Laval
AirGreen installed a Tosot wall-mounted heat pump in Chomedey, Laval. A compact and efficient HVAC solution, perfectly suited to condominium balconies and Quebec winters.
Take a tour of the installation
Each number is a point we check on site. Switch between summer and winter to watch air and heat move.
In summer, the outdoor unit rejects the house's heat outside.
Generic illustration of this type of installation, not a survey of this job site. Tap a number.
Mounted level on a wall plate, high enough for the air to reach the whole room, with enough space around it to slide the filters out easily.
The refrigerant lines, the communication cable and the drain go through the wall in a single opening, sealed against water, cold air and insects.
Two insulated copper pipes connect the two units. Outside, a line cover can protect them from sun, knocks and weather.
A shut-off switch near the outdoor unit isolates it safely for service. It must stay accessible at all times.
The compressor and the fan. In heating mode it captures heat from the outdoor air, even in winter, and moves it inside.
On the ground or on the wall, it keeps the unit above accumulated snow. The unit stays clear and defrost water can drain away.
The fan needs to blow freely. Storage, a fence or a wall too close, and efficiency drops while noise goes up.
A neat balcony installation for four-season comfort in Laval
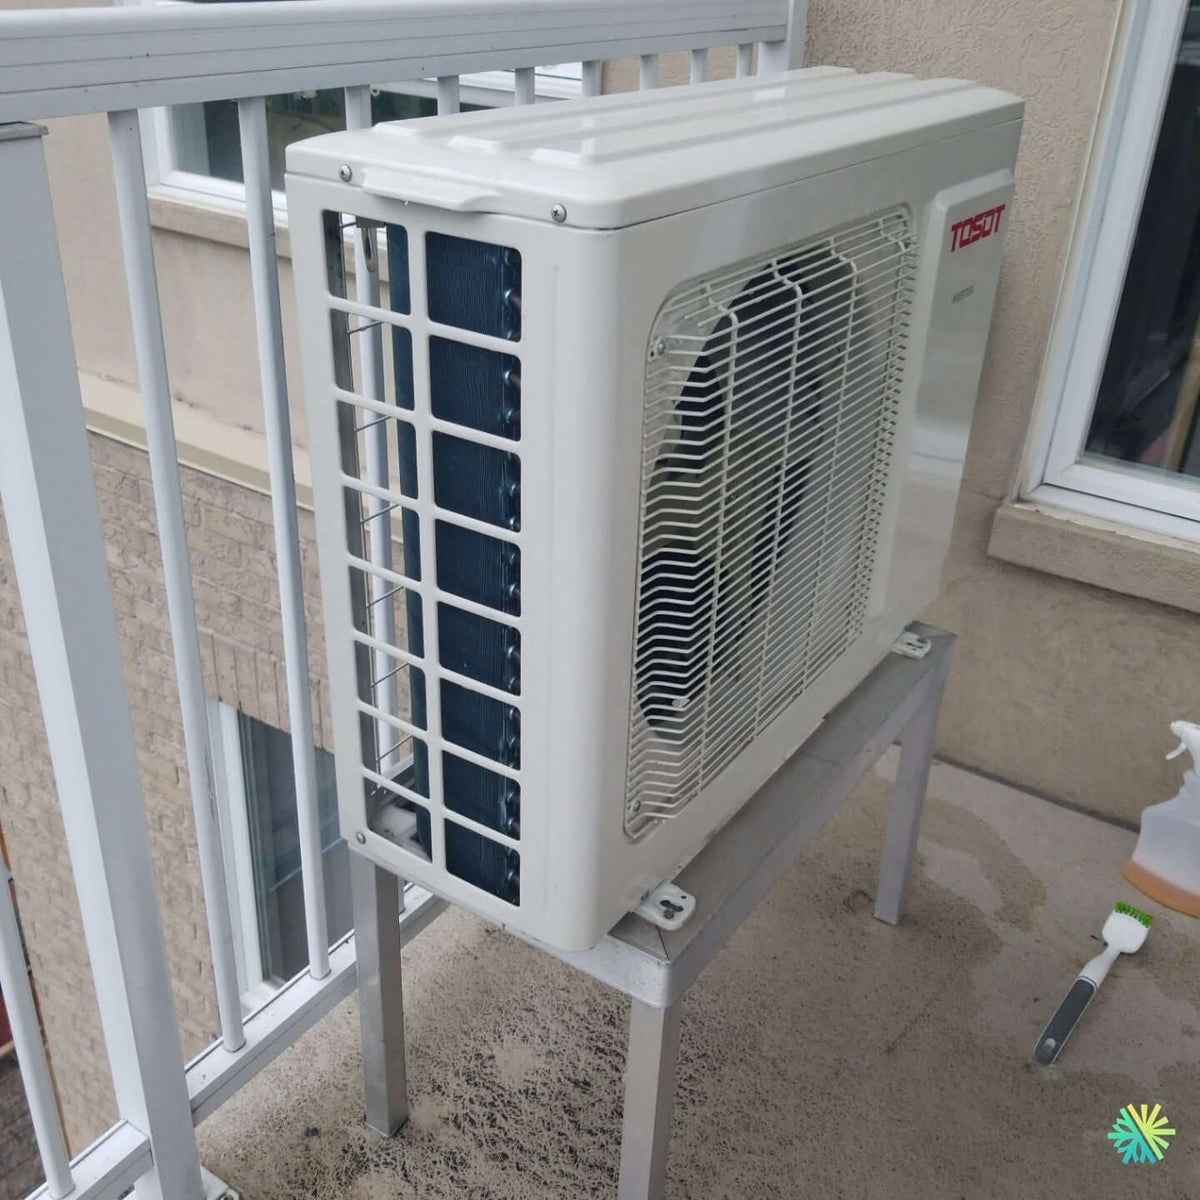
At AirGreen , we recently installed a Tosot wall-mounted heat pump in a condo located in Chomedey, Laval . This intervention perfectly illustrates our expertise in compact and efficient HVAC solutions , adapted to small spaces such as condominium balconies.
A typical Laval co-ownership context
The installation took place in a modern residential building , with metal balconies and white railings, characteristic of recent complexes in the Chomedey area. The available space required a precise configuration: the outdoor condenser had to be installed on a raised support , ensuring stability, optimal ventilation and compliance with co-ownership regulations.
Technical details of the installation
The Tosot outdoor unit, renowned for its stable energy efficiency down to -25°C , was fixed to a galvanized steel support , firmly anchored to the balcony floor. This elevation guarantees efficient drainage of condensate and protects the unit against the accumulation of snow or water.
The refrigeration route has been carefully planned to minimize pressure losses:
-
Direct passage through the exterior wall adjacent to the interior head,
-
Color-matched cabling to the front panel for discreet integration,
-
Gravity drainage to the exterior, optimizing reliability during thawing periods.
A wise choice: the Tosot, synonymous with reliability and efficiency
Tosot heat pumps are increasingly popular in Quebec for their excellent energy efficiency and compatibility with provincial grant programs (especially for Energy Star certified models). This unit offers:
-
Stable heating performance down to −25°C,
-
Inverter technology for constant comfort,
-
Quiet operation , ideal for condos and multiplexes,
-
Reduced consumption and long service life.
Adaptation to urban constraints
Installing a heat pump on a balcony in a condominium requires special attention:
-
Vibration reduction thanks to anti-vibration pads,
-
Respect ventilation clearances to avoid recycling of hot air,
-
Precise direction of the air flow so as not to disturb neighbors,
-
Use of certified supports to avoid excessive load on the slab.
At AirGreen, each installation in an urban context is preceded by a complete technical assessment , guaranteeing a result that complies with building standards and the customer's comfort requirements .
A quick, clean and safe installation
Our technicians completed the installation in a single day, including:
-
Installation of the metal support and the condenser,
-
The refrigeration and electrical connection,
-
Leakage and performance tests,
-
Calibrating the system for maximum efficiency.
Each step was carried out in compliance with safety and cleanliness protocols, ensuring a site without disorder or nuisance for the occupants.
A discreet and elegant result
The end result: a perfectly integrated , quiet and efficient outdoor unit, capable of providing heating and air conditioning all year round . The customer now benefits from constant indoor comfort , controlled energy consumption , and a durable system with simplified maintenance.
Maintenance and durability
To extend the performance of the heat pump, we recommend:
-
Annual cleaning of the condenser and internal filters,
-
A seasonal inspection of the drain and support,
-
A complete refrigerant check every two years.
Our teams offer an AirGreen maintenance program that guarantees optimal performance and prevents seasonal breakdowns.
AirGreen, the HVAC partner for Greater Montreal condominiums
This installation in Chomedey demonstrates our expertise in restricted-access environments , where every detail counts: silence, aesthetics, security, and energy performance . At AirGreen, we support our customers every step of the way—from choosing the right heat pump to professional installation , including grant applications and long-term maintenance.
The big day, step by step
The main steps of this kind of job at AirGreen. Every house has its quirks: the estimate brings them out.
We look at the room, the outside wall, the line route and where the outdoor unit will go. That is where the capacity gets chosen.
Model, capacity and price, in writing. We also check whether the model qualifies for assistance programs.
Floors and furniture protected, wall plate position marked level, wall opening located.
A single opening, with the slope the drain needs to flow outside.
Set on a stand raised above the snow, with the clearances the manufacturer requires.
Connected, insulated and protected. The opening is then sealed against water, cold air and insects.
A dedicated circuit and an accessible disconnect near the outdoor unit.
Leak test, vacuum, then start-up and a check of heating and cooling.
Remote, modes, filters: we show you the essentials before we leave.
- The on-site estimateWe look at the room, the outside wall, the line route and where the outdoor unit will go. That is where the capacity gets chosen.
- The quoteModel, capacity and price, in writing. We also check whether the model qualifies for assistance programs.
- Getting readyFloors and furniture protected, wall plate position marked level, wall opening located.
- The wall openingA single opening, with the slope the drain needs to flow outside.
- The outdoor unitSet on a stand raised above the snow, with the clearances the manufacturer requires.
- Lines, cable and drainConnected, insulated and protected. The opening is then sealed against water, cold air and insects.
- The electrical workA dedicated circuit and an accessible disconnect near the outdoor unit.
- Tests and start-upLeak test, vacuum, then start-up and a check of heating and cooling.
- The walkthroughRemote, modes, filters: we show you the essentials before we leave.
What would it look like at your place?
Two quick checks with real numbers: what heat costs, and what your current heaters add up to in BTU/h.
Conversion: 1 W = 3.412 BTU/h. An indication, not a load calculation: baseboards and furnaces are often stronger than the real need, and they can stay as backup. AirGreen confirms the capacity on site.
Four mistakes we do not make
Flip each card to see what we do instead.
Your own project, step by step
What to do, season by season
Three habits per season for this unit. They take a few minutes and prevent many calls.
- Clean the indoor unit's filters.
- Clear leaves and debris left on the outdoor unit by winter.
- Test cooling before the first hot days.
- Clean the filters more often when the unit runs a lot.
- Keep plants away from the outdoor unit.
- Check that no water drips from the indoor unit.
- Rake the leaves around the outdoor unit.
- Test heating before the first cold days.
- Book periodic maintenance before winter.
- Keep snow away from the stand and the front of the unit.
- Let the unit defrost: it is normal.
- Never hit the ice on the fins; call us if the unit stays iced up.
Is your home ready?
Check what applies at your place. A "no" is not a refusal: it is what we sort out during the estimate.
Four statements: true or false?
It all comes down to details you have just seen.
1. In heating mode, the outdoor unit can produce water.
During defrost cycles. That water must drain away without forming ice.
2. You pick the capacity with a simple square-footage rule.
Windows, insulation, orientation and how the room is used all count. Capacity is chosen on site.
3. A multi-zone connects several indoor heads to a single condenser.
One head per room, all on the same condenser. Each room keeps its own temperature.
4. The disconnect can sit behind the patio furniture.
It must stay accessible: it is what shuts the unit off for service.
0 / 4 right answers
What people ask us about this kind of work
Does a wall-mounted heat pump heat in winter?
Wall-mounted or multi-zone: how do I choose?
Where does the outdoor unit go?
Are there grants?
Do I need a permit?
How cold can it heat?
How much can I save?
How is the LogisVert assistance calculated?
Is it noisy?
The outdoor unit is covered in ice: is that normal?
Does AirGreen hold the required licences?
Is the estimate free?
No question matches. Write to us: we answer.
More jobs to see, near you
By town, by equipment or by region: browse more than 4,700 published projects.
Each dot: a town where AirGreen has published projects. The glowing dot: this job.
Every house has its constraints. We see them before we install.
The on-site estimate is free and the quote follows within 24 hours.
Text and photo: a real AirGreen Climatisation & Chauffage job. The diagrams are generic illustrations of the type of installation, not a survey of this job site. Sources of the added figures: airgreen.ca product pages (NEEP / AHRI performance), Hydro-Québec (Heat pumps page, LogisVert, read on 13 October 2026), Régie de l’énergie (rate D as of 1 April 2026).